

Good content takes time and effort to come up with.
Please consider supporting us by just disabling your AD BLOCKER and reloading this page again.


In this article, we will learn how to do Multiple File Uploads In PHP Laravel.
We will cover the following topics
If you already have the Laravel application skip to Step 2 else let's install the Laravel application with composer using the following command
composer create-project --prefer-dist laravel/laravel blog
The above command creates a new Laravel project with a name blog.
For the sake of demonstration I will keep the settings very simple, to run our project I will start the PHP built-in server with the help of artisan command as follows
php artisan serve
You will be able to see similar to the following output.
Laravel development server started: <http://127.0.0.1:8000>
Now you can run your application by running http://localhost:8000 or http://127.0.0.1:8000 from your web browser.
I have created the FileUploadsController which will handle view page redirects and mange file uploading after uploading from view page.
php artisan make:controller FileUploadsController
Route::get('/file-uploads/create', 'FileUploadsController@create');
Route::post('/file-uploads', 'FileUploadsController@store');
Let's see how our file uploading form looks like. For the sake of demonstration, I am just using only one field.
<!DOCTYPE html>
<html lang="en">

<head>
    <meta charset="UTF-8">
    <meta name="viewport" content="width=device-width, initial-scale=1.0">
    <title>Form Upload</title>
    <!-- Latest compiled and minified CSS -->
    <link rel="stylesheet" href="https://maxcdn.bootstrapcdn.com/bootstrap/3.3.7/css/bootstrap.min.css">
</head>
<body>
    <div class="container">
        <div class="row">
            <div class="col-md-4 col-md-offset-4">
                <h2 class="text-primary">File Upload Demo</h2>
                <form action="{{ url('file-uploads') }}" method="post" enctype="multipart/form-data">
                    @csrf
                    <div class="row">
                        <div class="col-md-12 form-group">
                            <label for="attachments"></label>
                            <input type="file" name="attachments[]" multiple id="attachments" class="form:control">
                        </div>
                    </div>
                    <br>
                    <div class="row">
                        <div class="col-md-12 form-group">
                            <input type="submit" value="Upload File" class="btn btn-primary">
                        </div>
                    </div>
                </form>
            </div>
        </div>
    </div>
</body>

</html>
Make sure not to skip enctype attribute in your form opening tag
<form action="{{ url('file-uploads') }}" method="post" enctype="multipart/form-data">
Observer name="attachments[]" array and multiple attribute for input element
<input type="file" name="attachments[]" multiple id="attachments" class="form:control">
NOTE: If you want to select multiple files while upload the files then use Control + Click / Command + Click / Shift + Arrow Keys
If you now run this http://localhost:8000/file-uploads/create URL in your browser you will be able to similar to the following output
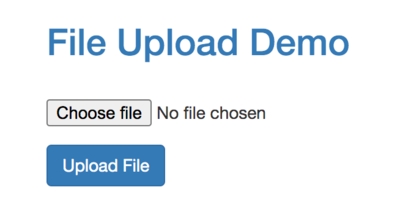
File Upload Demo
In this step lets handle the file submitted from the above file. First, let's see the full implementation then we will break down the code to understand.
public function store()
{
    /** Even request()->has('attachment') works */
    if (request()->hasFile('attachments')) {
        /** This is of type file */
        $attachments = request()->file('attachments');

        /** Loop multiple files for uploading */
        foreach ($attachments as $key => $attachment) {
            /** Laravel file helper methods */
            $attachmentExtension    = $attachment->getClientOriginalExtension();
            $attachmentMimeType     = $attachment->getClientMimeType();
            $attachmentName         = $attachment->getClientOriginalName();
            $attachmentSize         = $attachment->getClientSize();


            /** New attachment name, v - milliseconds */
            $attachmentNewName = 'attachment' . $key . date('YmdHisv') . '.' . $attachmentExtension;


            /** Instead of storage I will demo you storing in PUBLIC path same as that of assets folder */
            $uploadPath = public_path() . '/uploads/attachments/';
            $attachment->move($uploadPath, $attachmentNewName);
        }


        echo 'Upload completed';
    }
}
Let's break down the above gigantic code
if(request()->hasFile('attachments')) {
}
OR
if(request()->has('attachments')) {
}
/** Loop multiple files for uploading */
foreach ($attachments as $key => $attachment) {

}
/** Laravel file helper methods */
$attachment->getClientOriginalExtension(); /** png */
$attachment->getClientMimeType(); /** image/png */
$attachment->getClientOriginalName(); /** testing.png */
$attachment->getClientSize(); /** 23422 */
With the help of the above file helpers you can check the size of the file, check the image extensions and do a lot of other validations as per your needs.
Tip: You can do this validations in require()->validate()
You can also use Intervention Image package to mange image related operations very easily.
/** New attachment name, v - milliseconds */
$attachmentNewName = 'attachment' . $key . date('YmdHisv') . '.' . $attachmentExtension;
Other ways to generate unique id's are - time(), uniqid(), md5(time())
You can use this new attachment name to store in your database to display later in your view pages like the following
Note: The following is for the sake of demonstration, you may have different Model name and fields
Attachment::create([
    'name' => $attachmentNewName
]);
/** Instead of storage I will demo you storing in PUBLIC path same as that of assets folder */
$uploadPath = public_path() . '/uploads/attachments/';
Instead of storage I will demo you storing in PUBLIC path same as that of assets folder
By default, this method will use your default disk. If you would like to specify another disk, pass the disk name as the second argument to the store method:
$path = $request->file('avatar')->store(
    'avatars/'.$request->user()->id, 's3'
);
If you are using the storeAs method, you may pass the disk name as the third argument to the method:
$path = $request->file('avatar')->storeAs(
    'avatars',
    $request->user()->id,
    's3'
);
Following is the complete code of the controller. Tried my best to explain in comments
class FileUploadsController extends Controller
{
    public function create()
    {
        return view('file-uploads.create');
    }


    public function store()
    {
        /** Even request()->has('attachment') works */
        if (request()->hasFile('attachments')) {
            /** This is of type file */
            $attachments = request()->file('attachments');

            foreach ($attachments as $key => $attachment) {
                /** Laravel file helper methods */
                $attachmentExtension    = $attachment->getClientOriginalExtension();
                $attachmentMimeType     = $attachment->getClientMimeType();
                $attachmentName         = $attachment->getClientOriginalName();
                $attachmentSize         = $attachment->getClientSize();


                /** New attachment name, v - milliseconds */
                $attachmentNewName = 'attachment' . $key . date('YmdHisv') . '.' . $attachmentExtension;


                /** Instead of storage I will demo you storing in PUBLIC path same as that of assets folder */
                $uploadPath = public_path() . '/uploads/attachments/';
                $attachment->move($uploadPath, $attachmentNewName);
            }


            echo 'Upload completed';
        }
    }
}
Hope you enjoyed the article. Please share it with your friends.
Create / Save / Download PDF From Blade Template In PHP Laravel
Firebase Cloud Messaging (FCM) Browser Web Push Notifications Using Javascript And PHP
Use Different PHP Versions In Ubuntu / Linux
Multiple File Uploads In Laravel PHP
Securely SSH Your Server & Push Files With FileZilla
Generate RSS Feeds in PHP Laravel
Install RabbitMQ with Docker & Running with NodeJS
Composer Install v/s Composer Update
SummerNote WYSIWYG Text Editor
Getting Started With AMP (Accelerated Mobile Pages)
Generate SSH Key with ssh-keygen In Linux / Unix
Create Custom 404 Page In Laravel
What Is Composer? How Does It Work? Useful Composer Commands And Usage


