

Good content takes time and effort to come up with.
Please consider supporting us by just disabling your AD BLOCKER and reloading this page again.


Today you will learn a very interesting topic ie sending a notification to your blog followers or any subscribed users using Firebase Cloud Messaging
Code available in GitHub @ Firebase Cloud Messaging
We will cover the following topics
Go to firebase.google.com, Signup and choose plan as per your requirement. I am sticking with Free Plan for mine :)
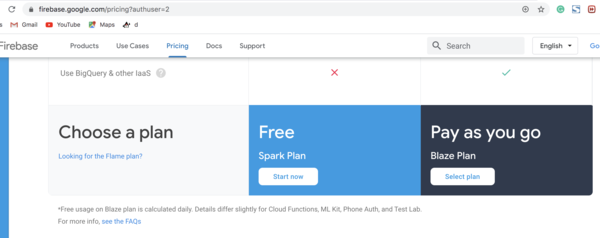
Firebase Choose Plan Image
Once you click on the plan you will be ask to Create Project
NOTE: In one Firebase project you can have multiple APPS
Now lets create our first project and generate keys. After sign up you will see the following
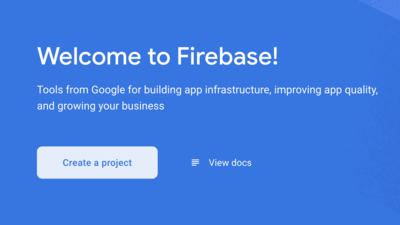
Firebase Create New Project Page
On click of Create Project button you will see the following page.
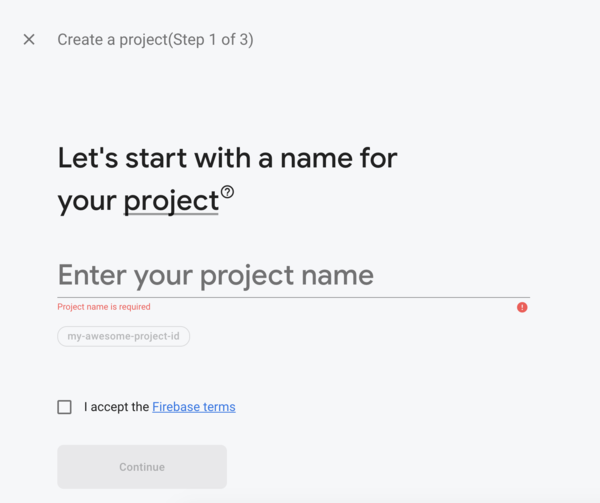
Firebase New Project Details | Step 1
Once you add your Project Name & Accept Terms click continue. You will go for step 2. If you need Google Analytics you can enable or disable by toggling the button as shown in the following image.
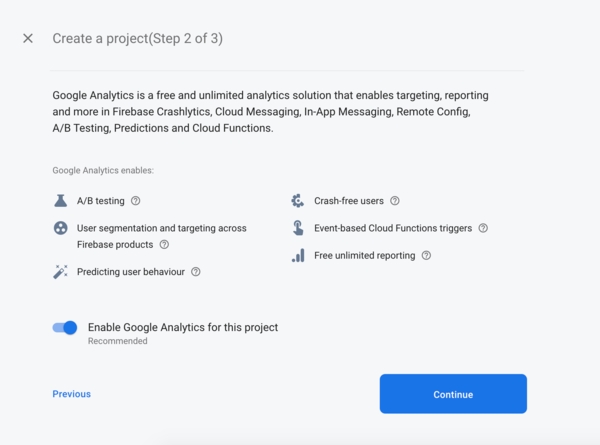
Firebase New Project | Step 2
If you have turned ON Enable Google Analytics then you will see the following Google Analytics Configure page where you need to select the account to setup the google analytics
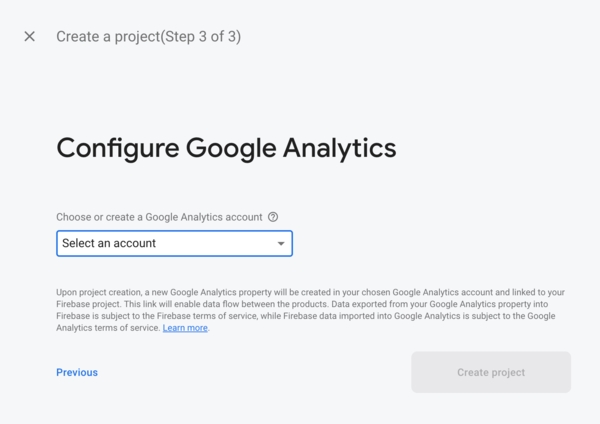
Firebase New Project (Enable Google Analytics) | Step 3
If everything setup properly then you will be able to see the success page as shown below
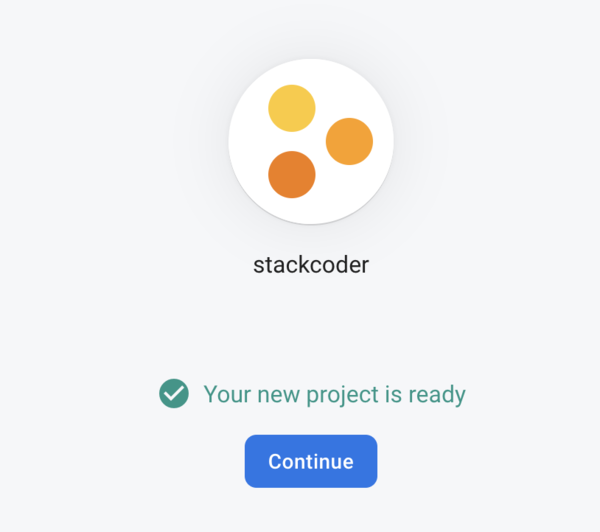
Firebase New Project Success Page
Now once you click on Continue you will be redirected to dashboard.
Once you are in your dashboard make sure you have selected proper project from top navigation dropdown as shown in the following image
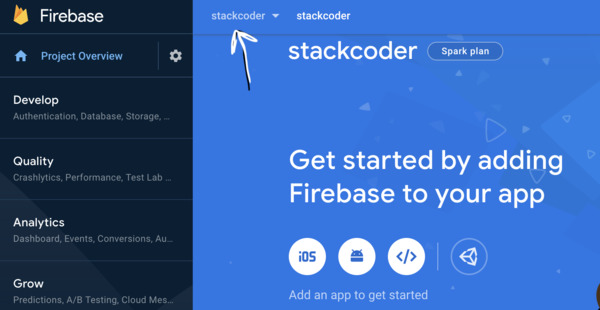
Select Proper Project | Firebase Dashboard
Now on the right hand side you can see Firebase integrations for iOS, Android, Web.
I will show you integration with the web so click on the web </>. You will see similar to the following image
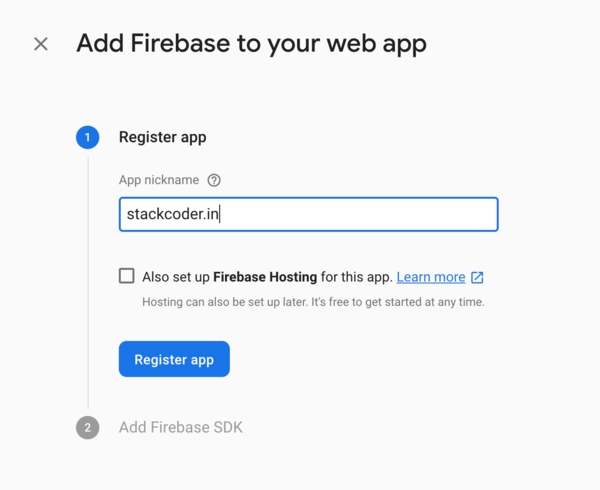
Web Integration | Register
Register you app by adding name. I dont want any Firebase Hosting so I left unchecked.
Next click on Register App. Once you click you will get he auto generate code similar to the following image. This code you need to put at end of your HTML body tag.
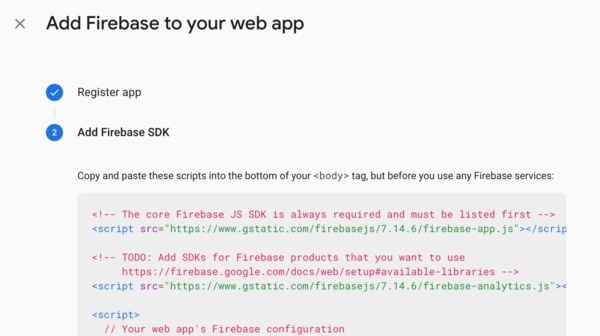
Firebase SDK Code
If your not interested in Google Analytics then remove that line of code.
By chance if you forgot to copy the above code or if you need at any later point of time in your project then you can navigate as follows to access the details of the keys for integration in your project

Check Firebase Project Settings
NOTE:One Firebase Projectcan have multipleAPPS. So there may be situation to only delete for particular APP of that project which can be achieved by just deleting theAPP.
Sometimes you may no longer require the Firebase projects as you might no longer work on that project or by mistake you published in some repository or you might just want to create tutorial for demonstration.
First to go your project settings
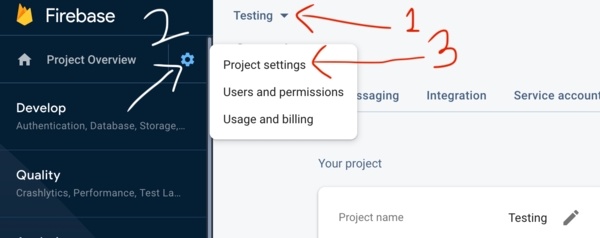
Firebase Project Settings
Next scroll down bit you will be able to see Delete APP and Delete Project as shown in the following image. You can choose as per your requirements.
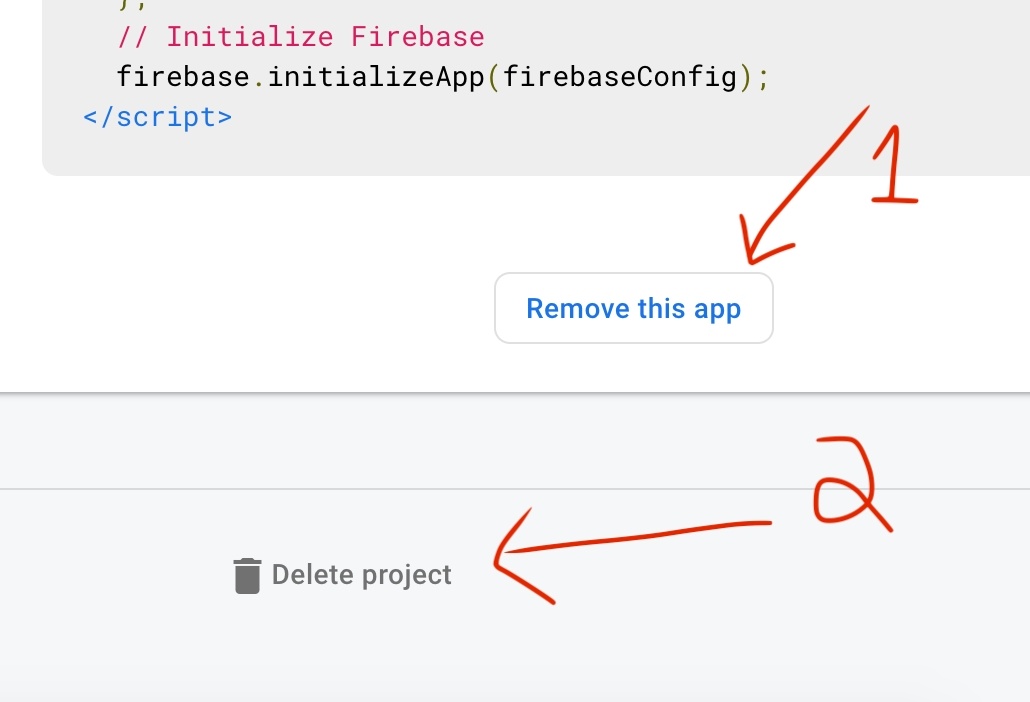
Delete Firebase Project | Delete Firebase Project App
You can just remove single APP or Delete Whole Project.
Lets start writing some code. Before that lets checkout our project folder structure.
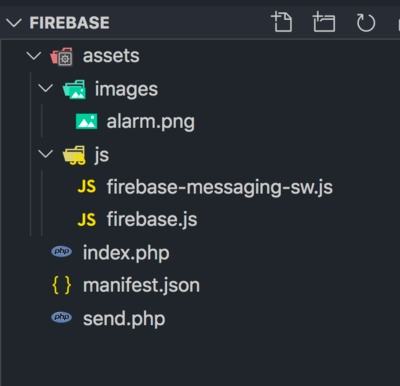
Project Folder Structure
The main files that we will work are the following
index.php - Simple welcome message page with firebase integrations
send.php - PHP code to push the firebase notifications to browsers
mainfest.json - File which will have simple google authentication code
js/firebase.js - File responsible for registering service worker registration and requesting permission from user to send notification
js/firebase-messaging-sw.js - Yes firebase service worker will look for this same file name. When any push notifications it triggered from firebase server then this is the file your service worker will look for and trigger messages.
<!DOCTYPE html>
<html lang="en">

<head>
    <title>Hello World!</title>
</head>

<body>
    This is demo page.
    <!-- The core Firebase JS SDK is always required and must be listed first -->
    <script src="https://www.gstatic.com/firebasejs/7.14.6/firebase-app.js"></script>
    <script src="https://www.gstatic.com/firebasejs/7.14.6/firebase-messaging.js"></script>

    <!-- Just include firebase.js file. The other firebase will be internally registered from this file -->
    <script src="./assets/js/firebase.js"></script>
</body>

</html>
{
    "gcm_sender_id": "your_gcm_sender_id from firebase project settings"
}
I will explain the firebase file code within the code snippet for easier understanding
/** Your web app's Firebase configuration
 * Copy from Login
 *      Firebase Console -> Select Projects From Top Naviagation
 *      -> Left Side bar -> Project Overview -> Project Settings
 *      -> General -> Scroll Down and Choose CDN for all the details
*/
var firebaseConfig = {
    apiKey: "AIzaSyAX9Nv95dFJduskPzMQGMtkM7ANzbp7BE0",
    authDomain: "stackcoder-c9aaf.firebaseapp.com",
    databaseURL: "https://stackcoder-c9aaf.firebaseio.com",
    projectId: "stackcoder-c9aaf",
    storageBucket: "stackcoder-c9aaf.appspot.com",
    messagingSenderId: "213794787721",
    appId: "1:213794787721:web:f69fca66880e3bc1321158",
    measurementId: "G-5CL6MXEDCW"
};
// Initialize Firebase
firebase.initializeApp(firebaseConfig);

/**
 * We can start messaging using messaging() service with firebase object
 */
var messaging = firebase.messaging();

/** Register your service worker here
 *  It starts listening to incoming push notifications from here
 */
navigator.serviceWorker.register('./assets/js/firebase-messaging-sw.js')
.then(function (registration) {
    /** Since we are using our own service worker ie firebase-messaging-sw.js file */
    messaging.useServiceWorker(registration);

    /** Lets request user whether we need to send the notifications or not */
    messaging.requestPermission()
        .then(function () {
            /** Standard function to get the token */
            messaging.getToken()
            .then(function(token) {
                /** Here I am logging to my console. This token I will use for testing with PHP Notification */
                console.log(token);
                /** SAVE TOKEN::From here you need to store the TOKEN by AJAX request to your server */
            })
            .catch(function(error) {
                /** If some error happens while fetching the token then handle here */
                updateUIForPushPermissionRequired();
                console.log('Error while fetching the token ' + error);
            });
        })
        .catch(function (error) {
            /** If user denies then handle something here */
            console.log('Permission denied ' + error);
        })
})
.catch(function () {
    console.log('Error in registering service worker');
});

/** What we need to do when the existing token refreshes for a user */
messaging.onTokenRefresh(function() {
    messaging.getToken()
    .then(function(renewedToken) {
        console.log(renewedToken);
        /** UPDATE TOKEN::From here you need to store the TOKEN by AJAX request to your server */
    })
    .catch(function(error) {
        /** If some error happens while fetching the token then handle here */
        console.log('Error in fetching refreshed token ' + error);
    });
});

// Handle incoming messages
messaging.onMessage(function(payload) {
    const notificationTitle = 'Data Message Title';
    const notificationOptions = {
        body: 'Data Message body',
        icon: 'https://c.disquscdn.com/uploads/users/34896/2802/avatar92.jpg',
        image: 'https://c.disquscdn.com/uploads/users/34896/2802/avatar92.jpg'
    };

    return self.registration.showNotification(notificationTitle, notificationOptions);
});
If you want to handle notifications even if user is on your page then you can use the following code snippet in the above code
// Handle incoming messages
messaging.onMessage(function(payload) {
    const notificationTitle = 'Data Message Title';
    const notificationOptions = {
        body: 'Data Message body',
        icon: 'https://c.disquscdn.com/uploads/users/34896/2802/avatar92.jpg',
        image: 'https://c.disquscdn.com/uploads/users/34896/2802/avatar92.jpg'
    };

    return self.registration.showNotification(notificationTitle, notificationOptions);
});
/** Again import google libraries */
importScripts("https://www.gstatic.com/firebasejs/7.14.6/firebase-app.js");
importScripts("https://www.gstatic.com/firebasejs/7.14.6/firebase-messaging.js");

/** Your web app's Firebase configuration
 * Copy from Login
 *      Firebase Console -> Select Projects From Top Naviagation
 *      -> Left Side bar -> Project Overview -> Project Settings
 *      -> General -> Scroll Down and Choose CDN for all the details
*/
var config = {
    apiKey: "AIzaSyAX9Nv95dFJduskPzMQGMtkM7ANzbp7BE0",
    authDomain: "stackcoder-c9aaf.firebaseapp.com",
    databaseURL: "https://stackcoder-c9aaf.firebaseio.com",
    projectId: "stackcoder-c9aaf",
    storageBucket: "stackcoder-c9aaf.appspot.com",
    messagingSenderId: "213794787721",
    appId: "1:213794787721:web:f69fca66880e3bc1321158",
    measurementId: "G-5CL6MXEDCW"
};
firebase.initializeApp(config);

// Retrieve an instance of Firebase Data Messaging so that it can handle background messages.
const messaging = firebase.messaging();

/** THIS IS THE MAIN WHICH LISTENS IN BACKGROUND */
messaging.setBackgroundMessageHandler(function(payload) {
    const notificationTitle = 'BACKGROUND MESSAGE TITLE';
    const notificationOptions = {
        body: 'Data Message body',
        icon: 'https://c.disquscdn.com/uploads/users/34896/2802/avatar92.jpg',
        image: 'https://c.disquscdn.com/uploads/users/34896/2802/avatar92.jpg'
    };

    return self.registration.showNotification(notificationTitle, notificationOptions);
});
You can get the it as of now from console as I am outputting to console in firebase.js file as follows
console.log(token);
Now we can send the notifications by using CURL calls or something. Just in case if we need to send notifications to all users or particular users then its good idea to automate and write code.
<?php

/** Google URL with which notifications will be pushed */
$url = "https://fcm.googleapis.com/fcm/send";
/**
 * Firebase Console -> Select Projects From Top Naviagation
 *      -> Left Side bar -> Project Overview -> Project Settings
 *      -> General -> Scroll Down and you will be able to see KEYS
 */
$subscription_key  = "key=AAAAMccpkYk:APA91bH02j3-QPtQWfq0e_Mpp542LAGm8n3-7_lZWtnHCwQuGFKIFljam_hY3dDAkrkcaAt6Fk0wmN0qGc_9S182y7XM0Fum-aHlHHU4rm1KL2RBi7RaPfRZsIHv7OajYm5cVno7JRkC";

/** We will need to set the following header to make request work */
$request_headers = array(
    "Authorization:" . $subscription_key,
    "Content-Type: application/json"
);

/** Data that will be shown when push notifications get triggered */
$postRequest = [
    "notification" => [
        "title" =>  "New Article",
        "body" =>  "Firebase Cloud Messaging for Web using JavaScript",
        "icon" =>  "https://c.disquscdn.com/uploads/users/34896/2802/avatar92.jpg",
        "click_action" =>  "http://localhost:8888/test"
    ],
    /** Customer Token, As of now I got from console. You might need to pull from database */
    "to" =>  "fQocFMkyMaJpkRXwk9x1tL:APA91bEVLZ2t1L4MEEzSD9ywO9n6P_JruQylDLctH-vaLcBSATNvlplVN-YJa_cDpNzZ-4XhYWaMIKzM_asozonWziWcEHWhTxJ6EGhYrD7YWppip2FtBbyVcQDaEbz077hcU-G9GN_L"
];

/** CURL POST code */
$ch = curl_init();
curl_setopt($ch, CURLOPT_URL, $url);
curl_setopt($ch, CURLOPT_POSTFIELDS, json_encode($postRequest));
curl_setopt($ch, CURLOPT_RETURNTRANSFER, 1);
curl_setopt($ch, CURLOPT_HTTPHEADER, $request_headers);

$season_data = curl_exec($ch);

if (curl_errno($ch)) {
    print "Error: " . curl_error($ch);
    exit();
}
// Show me the result
curl_close($ch);
$json = json_decode($season_data, true);

echo '<pre>';
print_r($json);
In case if you want to send for multiple then add the loop for the requests. Or better create TOPICS / GROUPS to target specific customers.
Lets start testing the FCM notifications in Postman.
REQUEST METHOD - POST
REQUEST URL - https://fcm.googleapis.com/fcm/send
HEADERS
Content-Type - application/json
Authorization - key=your_server_key
BODY -> raw ->
{
  "to" : "customer token saved in db or in logged in console",
  "notification" : {
      "body" : "Test message",
      "title" : "Testing Title",
      "icon" : "https://stackcoder.in/images/stackcoder-tile-logo.png",
      "click_action" : "https://stackcoder.in"
    }
}
You need to add the above details as shown in the following
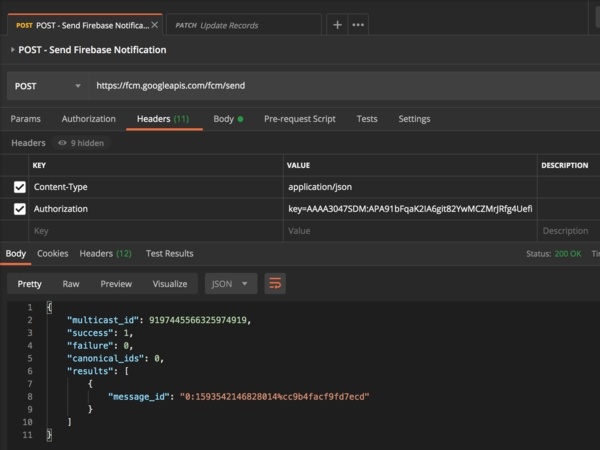
Postman FCM Notification Header Details
Now add the body in the following way
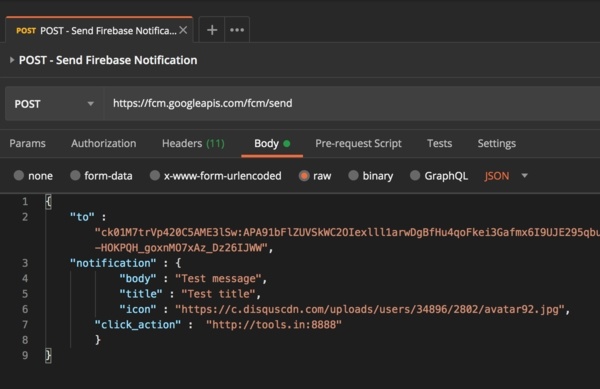
Postman FCM Notification Body Details
When any customer is in your website and you trigger some notifications from server then we can show some toaster messages to user or some kind of small notification on top menu saying something about your notification instead of sending notification as usual. Lets handle this
Now go to your firebase.js file and do the following settings
var messaging = firebase.messaging();

messaging.onMessage(function(payload) {
    console.log(payload);
});
onMessage is the function which is responsible for handling your notification when user is on your website and browsing something
To handle your background notifications you usually send notifications with the following body
{
  "to" : "customer token saved in db or in logged in console",
  "notification" : {
      "body" : "Test message",
      "title" : "Testing Title",
      "icon" : "https://stackcoder.in/images/stackcoder-tile-logo.png",
      "click_action" : "https://stackcoder.in"
    }
}
{
  "to" : "customer token saved in db or in logged in console",
  "notification" : {
      "body" : "Test message",
      "title" : "Testing Title",
      "icon" : "https://stackcoder.in/images/stackcoder-tile-logo.png",
      "click_action" : "https://stackcoder.in"
    }
}
Basically everything remains the same other than "notification" & "data" key.
Ya I know its kind of shit thing to tell when to run what. Hopefully we will have easy way to handle with single code someday.
Hope you like the article. Please share with your friends.
Code available in GitHub @Firebase Cloud Messaging
Composer Install v/s Composer Update
Client-Side DataTable, Adding Super Powers To HTML Table
Dependency Dropdowns With Javascript And PHP
Free SSL Certificate With Lets Encrypt/Certbot In Linux (Single / Multiple Domains)
URL Redirects From Called Functions In Laravel
What Is Composer? How Does It Work? Useful Composer Commands And Usage
Unable to prepare route [{fallbackPlaceholder}] for serialization. Uses Closure In Laravel
PHP Built-In Web Server & Testing Your Development Project In Mobile Without Any Software
Testing Laravel Emails With MailHog
Install Linux, NGINX, MYSQL, PHP (LEMP Stack) on Ubuntu


