

Good content takes time and effort to come up with.
Please consider supporting us by just disabling your AD BLOCKER and reloading this page again.


Part 2: (This article) Install Letsencrypt SSL Certificate
- RabbitMQ Management GUI
- RabbitMQ Server
In the Part 1 we saw how to install RabbitMQ. In this part let's see how to install an SSL certificate to secure the RabbitMQ Server & RabbitMQ Management GUI tool.
Following are the topics
You have created a subdomain (testbroker.stackcoder.in, www.testbroker.stackcoder.in) or with your domain name with A Certificates and point to your current server.
You cannot install a Letsencrypt SSL certificate without a domain name. So make sure you are up and running with it.
Since RabbitMQ Management runs on HTTP protocol, we will use NGINX as a reverse proxy for RabbitMQ Management GUI that runs on Port: 15672.
sudo apt install nginx
Before we proceed to install the Letsencrypt certificate let us create an NGINX configuration for RabbitMQ Management because Letsencrypt will by default read our NGINX website configuration and will install the SSL certificates automatically.
NOTE: RabbitMQ Management GUI that runs on Port: 15672/etc/nginx/sites-available/testbroker.stackcoder.in
server {
    listen 80;
  	server_name  testbroker.stackcoder.in www.testbroker.stackcoder.in;

  	location / {
  		proxy_set_header Host        $host;
  		proxy_set_header X-Real-IP     $remote_addr;
  		proxy_set_header X-Forwarded-For  $proxy_add_x_forwarded_for;
  		proxy_set_header Upgrade $http_upgrade;
  		proxy_set_header Connection "upgrade";

  		#The following will make sure to talk to RabbitMQ Management
  		proxy_pass http://127.0.0.1:15672;

  		# Proxy redirect settings
  		proxy_redirect off;

  		# HTTP version settings
  		proxy_http_version 1.1;

  		# Response buffering from proxied server default 1024m
  		proxy_max_temp_file_size 0;

  		# Proxy cache bypass define conditions under the response will not be taken from cache
  		proxy_cache_bypass $http_upgrade;
  	}
  }
Observe the following line in the above code, we are making sure the requests of Port: 80 from domain testbroker.stackcoder.in are redirected to localhost to Port: 15672 ie localhost:15672
proxy_pass http://127.0.0.1:15672;
Don't worry if you don't see the SSL certificate above. We will generate an SSL certificate in the next step with the help of Letsencrypt.
Hope the following article will help you to understand more about Letsencrypt SSL certificate
Create SSL certificates with Letsencrypt
Since I am running on Ubuntu 22.04 with Nginx I will select the Software -> Nginx & System -> Ubuntu 20.04 from the following URL to install the Letsencrypt certificate. Ubuntu 20.04 will also work for Ubuntu 22.04 version so chill out.
Letsencrypt certificate instructions URL: https://certbot.eff.org
sudo snap install core; sudo snap refresh core

sudo snap install --classic certbot

sudo ln -s /snap/bin/certbot /usr/bin/certbot

sudo certbot --nginx
The last step will ask for confirmation of domains will space or command separated URLs so kindly provide that.
After the Letsencrypt certificate installation your website Nginx configuration will look like the following
/etc/nginx/sites-available/testbroker.stackcoder.in
server {
    server_name    testbroker.stackcoder.in www.testbroker.stackcoder.in;

    location / {
        proxy_set_header Host               $host;
        proxy_set_header X-Real-IP          $remote_addr;
        proxy_set_header X-Forwarded-For    $proxy_add_x_forwarded_for;
        proxy_set_header Upgrade $http_upgrade;
        proxy_set_header Connection "upgrade";

        proxy_pass http://127.0.0.1:15672;

        # Proxy redirect settings
        proxy_redirect off;

        # HTTP version settings
        proxy_http_version 1.1;

        # Response buffering from proxied server default 1024m
        proxy_max_temp_file_size 0;

        # Proxy cache bypass define conditions under the response will not be taken from cache
        proxy_cache_bypass $http_upgrade;
    }


    listen 443 ssl; # managed by Certbot
    ssl_certificate /etc/letsencrypt/live/testbroker.stackcoder.in/fullchain.pem; # managed by Certbot
    ssl_certificate_key /etc/letsencrypt/live/testbroker.stackcoder.in/privkey.pem; # managed by Certbot
    include /etc/letsencrypt/options-ssl-nginx.conf; # managed by Certbot
    ssl_dhparam /etc/letsencrypt/ssl-dhparams.pem; # managed by Certbot


}
server {
    if ($host = www.testbroker.stackcoder.in) {
        return 301 https://$host$request_uri;
    } # managed by Certbot


    if ($host = testbroker.stackcoder.in) {
        return 301 https://$host$request_uri;
    } # managed by Certbot


    listen         80;
    server_name    testbroker.stackcoder.in www.testbroker.stackcoder.in;
    return 404; # managed by Certbot
}
Oh! Yeah. That was a piece of cake right? Now if you visit the browser https://testbroker.stackcoder.in then you must be able to see the following GUI
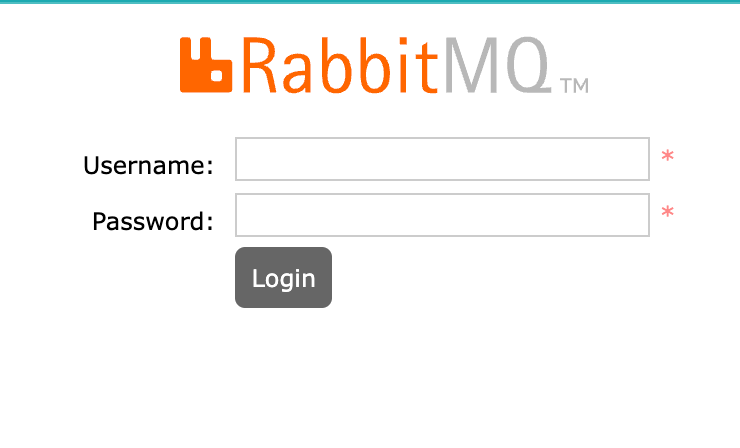
RabbitMQ Management Tool Login
We have configured the SSL certificate for RabbitMQ Management tools. Now let us see how to install the SSL certificate to RabbitMQ Server.
If we observe from the above configuration file then we can see that we have already generate the SSL certificate so let us use the same for RabbitMQ Server.
ssl_certificate /etc/letsencrypt/live/testbroker.stackcoder.in/fullchain.pem; # managed by Certbot
ssl_certificate_key /etc/letsencrypt/live/testbroker.stackcoder.in/privkey.pem; # managed by Certbot
We can do the configuration files for RabbitMQ Server in the following file (If the file does not exist then create it)
/etc/rabbitmq/rabbitmq.conf
listeners.ssl.default = 5671
ssl_options.cacertfile = /etc/letsencrypt/live/testbroker.stackcoder.in/fullchain.pem
ssl_options.certfile = /etc/letsencrypt/live/testbroker.stackcoder.in/fullchain.pem
ssl_options.keyfile = /etc/letsencrypt/live/testbroker.stackcoder.in/privkey.pem
ssl_options.verify = verify_peer
ssl_options.fail_if_no_peer_cert = true
Restart the RabbitMQ Server for the settings to take effect.
sudo service rabbitmq-server restart

sudo service rabbitmq-server status
Yup! That's all the configuration needed for the RabbitMQ Server. Let's check if the SSL certificate installed is working or not
cat /var/log/rabbitmq/rabbit@ip-172-31-17-67.log
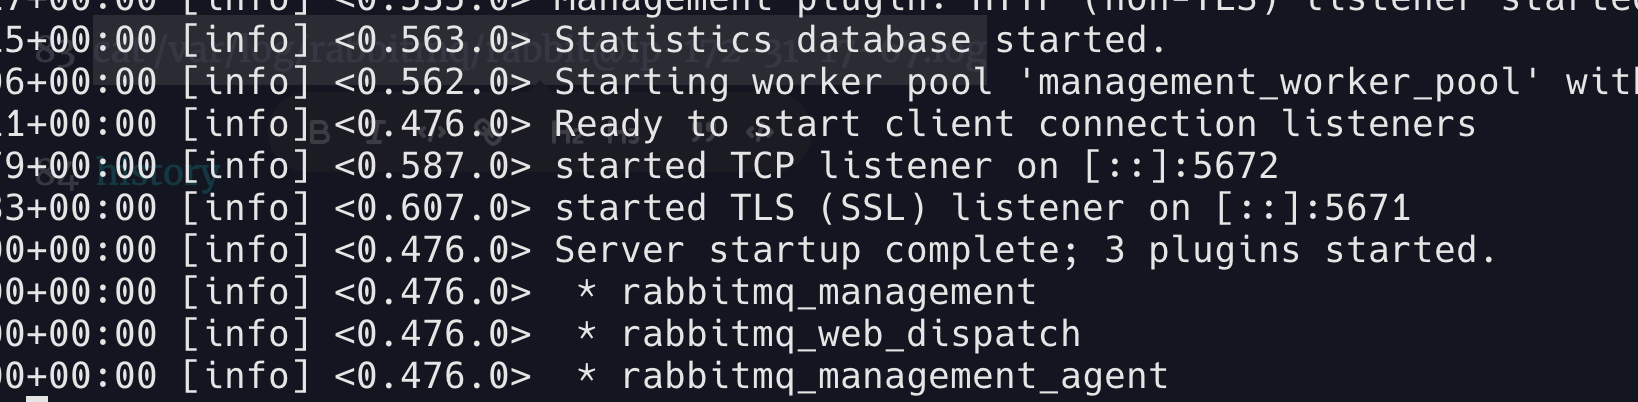
RabbitMQ Server SSL Certificates
Add Analytics To AMP (Accelerated Mobile Pages) HTML Pages
Stripe Payment Integration With Laravel
What Is Method Chaining In PHP?
PHP Built-In Web Server & Testing Your Development Project In Mobile Without Any Software
composer.json v/s composer.lock
Google, Twitter, GitHub, Facebook & Many Other Social Generic Logins With PHP Laravel Socialite
What Is Composer? How Does It Work? Useful Composer Commands And Usage
Install Linux, Apache, MYSQL, PHP (LAMP Stack) on Ubuntu
Make Laravel Controllers Slim By Skimming Form Validation Request
Detect AdBlocker With Javascript And Increase Website Ads Revenue


