Good content takes time and effort to come up with.
Please consider supporting us by just disabling your AD BLOCKER and reloading this page again.

Install RabbitMQ in Ubuntu 22
Part 1: (This article) RabbitMQ Installation
Part 2: Install Letsencrypt SSL Certificate
- RabbitMQ Management GUI
- RabbitMQ Server
In this post let's see how to install RabbitMQ 3.11 in Ubuntu 22.04 with the following options
- Install RabbitMQ
- Method 1: From the Ubuntu APT package source (Not recommended)
- Method 2: Install the latest version from the documentation (Preferred way)
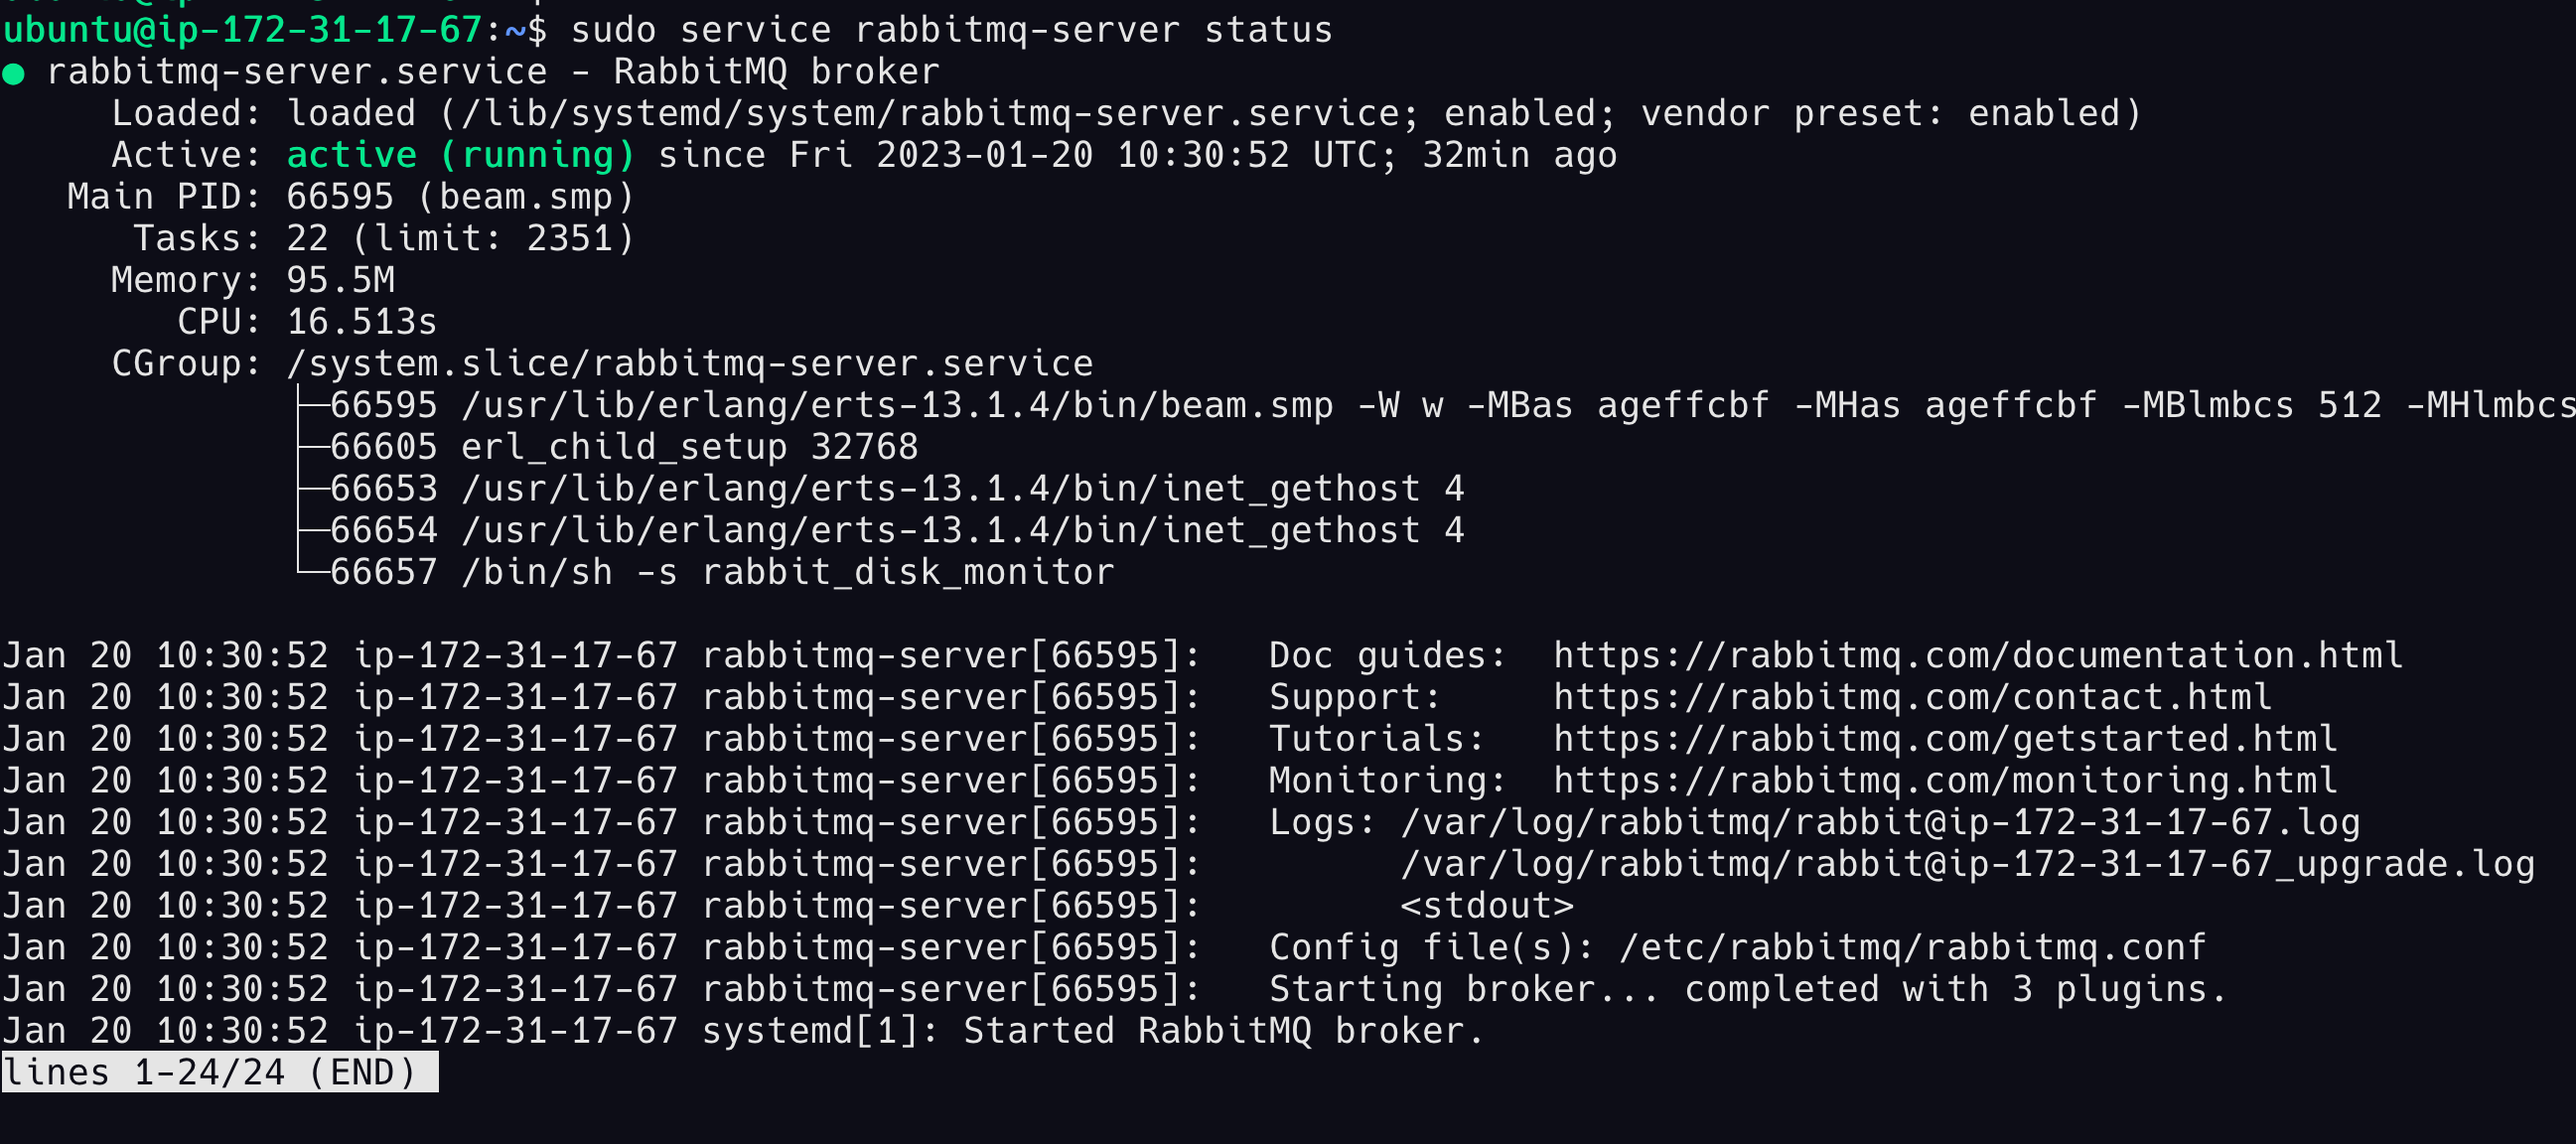
- Check the RabbitMQ service status
- Create users to log in to RabbitMQ Management GUI
- Enable the RabbitMQ Management plugin
Installing RabbitMQ
Method 1: From Ubuntu APT package source (Not recommended)
The following way of installing RabbitMQ is not recommended as it will not install the latest versions:
sudo apt update
sudo apt install rabbitmq-server
rabbitmqctl --version
sudo rabbitmqctl --version
You can remove it with the following:
sudo apt remove rabbitmq-server
Method 2: Install the latest version from the documentation (Preferred way)
Since RabbitMQ uses libssl1.1 we shall install it first so that you won't face any errors in the next steps
wget http://archive.ubuntu.com/ubuntu/pool/main/o/openssl/libssl1.1_1.1.1f-1ubuntu2.16_amd64.deb

sudo dpkg -i libssl1.1_1.1.1f-1ubuntu2.16_amd64.deb
Now we can proceed with the RabbitMQ installation procedure, the following steps are copy-pasted from the documentation which can be found at https://www.rabbitmq.com/install-debian.html#apt-cloudsmith
sudo apt-get install curl gnupg apt-transport-https -y

## Team RabbitMQ's main signing key
curl -1sLf "https://keys.openpgp.org/vks/v1/by-fingerprint/0A9AF2115F4687BD29803A206B73A36E6026DFCA" | sudo gpg --dearmor | sudo tee /usr/share/keyrings/com.rabbitmq.team.gpg > /dev/null
## Cloudsmith: modern Erlang repository
curl -1sLf https://dl.cloudsmith.io/public/rabbitmq/rabbitmq-erlang/gpg.E495BB49CC4BBE5B.key | sudo gpg --dearmor | sudo tee /usr/share/keyrings/io.cloudsmith.rabbitmq.E495BB49CC4BBE5B.gpg > /dev/null
## Cloudsmith: RabbitMQ repository
curl -1sLf https://dl.cloudsmith.io/public/rabbitmq/rabbitmq-server/gpg.9F4587F226208342.key | sudo gpg --dearmor | sudo tee /usr/share/keyrings/io.cloudsmith.rabbitmq.9F4587F226208342.gpg > /dev/null

## Add apt repositories maintained by Team RabbitMQ
sudo tee /etc/apt/sources.list.d/rabbitmq.list <<EOF
## Provides modern Erlang/OTP releases
##
deb [signed-by=/usr/share/keyrings/io.cloudsmith.rabbitmq.E495BB49CC4BBE5B.gpg] https://dl.cloudsmith.io/public/rabbitmq/rabbitmq-erlang/deb/ubuntu bionic main
deb-src [signed-by=/usr/share/keyrings/io.cloudsmith.rabbitmq.E495BB49CC4BBE5B.gpg] https://dl.cloudsmith.io/public/rabbitmq/rabbitmq-erlang/deb/ubuntu bionic main

## Provides RabbitMQ
##
deb [signed-by=/usr/share/keyrings/io.cloudsmith.rabbitmq.9F4587F226208342.gpg] https://dl.cloudsmith.io/public/rabbitmq/rabbitmq-server/deb/ubuntu bionic main
deb-src [signed-by=/usr/share/keyrings/io.cloudsmith.rabbitmq.9F4587F226208342.gpg] https://dl.cloudsmith.io/public/rabbitmq/rabbitmq-server/deb/ubuntu bionic main
EOF

## Update package indices
sudo apt-get update -y

## Install Erlang packages
sudo apt-get install -y erlang-base \
                        erlang-asn1 erlang-crypto erlang-eldap erlang-ftp erlang-inets \
                        erlang-mnesia erlang-os-mon erlang-parsetools erlang-public-key \
                        erlang-runtime-tools erlang-snmp erlang-ssl \
                        erlang-syntax-tools erlang-tftp erlang-tools erlang-xmerl

## Install rabbitmq-server and its dependencies
sudo apt-get install rabbitmq-server -y --fix-missing
Install Essential Dependencies
sudo apt-get update -y
sudo apt-get install curl gnupg -y
Enable apt HTTPS Transport
In order for apt to be able to download RabbitMQ and Erlang packages from services such as PackageCloud, Cloudsmith.io or Launchpad, the apt-transport-https package must be installed:
sudo apt-get install apt-transport-https
Add Repository Signing Keys
Cloudsmith signs distributed packages using their own GPG keys, one per repository.
In order to use the repositories, their signing keys must be added to the system. This will enable apt to trust packages signed by that key.
sudo apt-get install curl gnupg apt-transport-https -y

## Team RabbitMQ's main signing key
curl -1sLf "https://keys.openpgp.org/vks/v1/by-fingerprint/0A9AF2115F4687BD29803A206B73A36E6026DFCA" | sudo gpg --dearmor | sudo tee /usr/share/keyrings/com.rabbitmq.team.gpg > /dev/null
## Cloudsmith: modern Erlang repository
curl -1sLf https://dl.cloudsmith.io/public/rabbitmq/rabbitmq-erlang/gpg.E495BB49CC4BBE5B.key | sudo gpg --dearmor | sudo tee /usr/share/keyrings/io.cloudsmith.rabbitmq.E495BB49CC4BBE5B.gpg > /dev/null
## Cloudsmith: RabbitMQ repository
curl -1sLf https://dl.cloudsmith.io/public/rabbitmq/rabbitmq-server/gpg.9F4587F226208342.key | sudo gpg --dearmor | sudo tee /usr/share/keyrings/io.cloudsmith.rabbitmq.9F4587F226208342.gpg > /dev/null
Add a Source List File
As with all 3rd party apt repositories, a file describing the RabbitMQ and Erlang package repositories must be placed under the /etc/apt/sources.list.d/ directory. /etc/apt/sources.list.d/rabbitmq.list is the recommended location.
The file should have a source (repository) definition line that uses the following pattern:
## Provides modern Erlang/OTP releases
##
## Replace $distribution with the name of the Ubuntu release used.
## On Debian, "deb/ubuntu" should be replaced with "deb/debian"
deb [signed-by=/usr/share/keyrings/io.cloudsmith.rabbitmq.E495BB49CC4BBE5B.gpg] https://dl.cloudsmith.io/public/rabbitmq/rabbitmq-erlang/deb/ubuntu $distribution main
deb-src [signed-by=/usr/share/keyrings/io.cloudsmith.rabbitmq.E495BB49CC4BBE5B.gpg]  https://dl.cloudsmith.io/public/rabbitmq/rabbitmq-erlang/deb/ubuntu $distribution main

## Provides RabbitMQ
##
## Replace $distribution with the name of the Ubuntu release used.
## On Debian, "deb/ubuntu" should be replaced with "deb/debian"
deb [signed-by=/usr/share/keyrings/io.cloudsmith.rabbitmq.9F4587F226208342.gpg] https://dl.cloudsmith.io/public/rabbitmq/rabbitmq-server/deb/ubuntu $distribution main
deb-src [signed-by=/usr/share/keyrings/io.cloudsmith.rabbitmq.9F4587F226208342.gpg] https://dl.cloudsmith.io/public/rabbitmq/rabbitmq-server/deb/ubuntu $distribution main
Check the RabbitMQ service status
sudo service rabbitmq-server status
Creating User
By default guest users will only work in localhost so let's create a user so that we can log in from RabbitMQ Management tool.
#Username Password
sudo rabbitmqctl add_user stackcoderuser StackCoderPassword
sudo rabbitmqctl set_user_tags stackcoderuser administrator
sudo rabbitmqctl set_permissions -p / stackcoderuser ".*" ".*" ".*"
RabbitMQ Management GUI
RabbitMQ Server runs on Port 5672 and RabbitMQ Management GUI runs on Port 15672
List RabbitMQ Plugins
To check the list of available plugin list we can use the following command
sudo rabbitmq-plugins list
Install Management Plugin
Now let us enable RabbitMQ Management UI with the following command
sudo rabbitmq-plugins enable rabbitmq_management
Articles For You
Firebase Cloud Messaging (FCM) Browser Web Push Notifications Using Javascript And PHP
Multiple File Uploads In Laravel PHP
Increase Session Timeout In Laravel
Send Email In PHP With PHPMailer
Push Files To CPanel / Remote Server using FTP Software FileZilla
Install Linux, Apache, MYSQL, PHP (LAMP Stack) on Ubuntu
Ensure text remains visible during Webfont load
SummerNote WYSIWYG Text Editor
Supervisor For Laravel Queue Scheduling
What Is Laravel Resourceful Controllers?


