Good content takes time and effort to come up with.
Please consider supporting us by just disabling your AD BLOCKER and reloading this page again.

Laravel Custom Maintenance Page
In this article, I will share you simple way to put your Laravel website in a maintenance mode with a custom page.
Why?
Sometime we might need to upgrade the website or might have fixed some bugs and doing major releases which may affect the user experience than its best to put a website in maintenance mode and tell users till what time your site will be up and running.
We will cover the following
- Laravel Installation
- Default Maintenance Mode & Live Mode
- Custom Maintenance Mode
- Allow Access To Website From Particular IP Address In Maintenance Mode
Step 1 - Laravel Installation
If you already have the Laravel application skip to Step 2 else let's install the Laravel application with composer using the following command
composer create-project --prefer-dist laravel/laravel blog
The above command creates a new Laravel project with name blog.
Step 2 - Default Maintenance Mode & Live Mode
Put Into Maintenance Mode (Application Down)
php artisan down
The above command is used to put your website in maintenance mode. Once you run the above command your website will be shown as follows
Make Live From Maintenance Mode (Application Up)
php artisan up
With the help of the above command, you will be able to make your website up and running again.
Step 3 - Custom Maintenance Mode
When we put our website to maintenance mode then Laravel searches for 503 blade page inside views/errors/503.blade.php if it finds that page then it will run that page for the maintenance else it will run the default page as in Step 2
First, we need to create errors/503.blade.php page if not exists in your view folder.
views/errors/503.blade.php
<!DOCTYPE html>
<html lang="en">
<head>
    <meta charset="UTF-8">
    <meta name="viewport" content="width=device-width, initial-scale=1.0">
    <title>Maintenance Mode</title>
    <style>
        *{ margin: 0px; padding: 0px; }
        body{ font-family: Arial, sans-serif;}
        .container{ margin: 0px 20px; padding: 20px; }
        .text-center{ text-align: center; }
        .title{ font-size: 30px; }
        .subtitle{ font-size:20px; color: #aaa; margin-top: 50px; }
    </style>
</head>
<body>
    <div class="container">
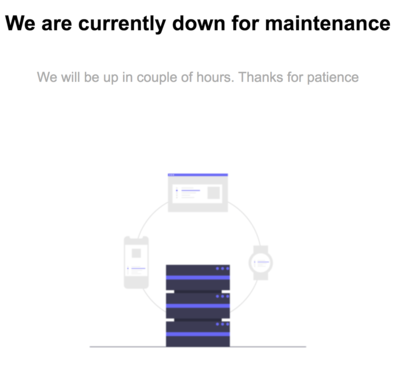
        <h1 class="text-center title">We are currently down for maintenance</h1>
        <div class="text-center subtitle">We will be up in couple of hours. Thanks for patience</div>
        <!-- You can add your maintenance image here -->
        <!-- <div class="text-center">
            <img src="{{ asset('images/maintenance.png') }}" alt="Maintenance Image" class="maintenance-image">
        </div> -->
    </div>
</body>
</html>
Basically you can have your maintenance page as above. This will basically look like the following
Once you make the above changes run the following command to put your website to maintenance mode.
Putting To Maintenance Mode
php artisan down
Making Website Live Again
php artisan up
Step 4 - Allow Access To Website From Particular IP Address In Maintenance Mode
If you want then you can basically allow the website to be down for the rest of the world expect to access from few IP Address as follows
Allow From Specific IP Address
php artisan down --allow=127.0.0.1:8000 --allow=192.168.120.1
This command allows you to access the website to be accessible from the above 2 IP Address locations. Similarly, you can add multiple IP Addresses
Conclusion
Hope you enjoyed the article. Please share with your friends.
Articles For You
Why You Should Run Cronjobs In Laravel?
Run Raw Queries Securely In Laravel
What Is Laravel Resourceful Controllers?
Generate RSS Feeds in PHP Laravel
Proper Way To Validate MIME Type Of Files While Handling File Uploads In PHP
PHP Built-In Web Server & Testing Your Development Project In Mobile Without Any Software
Dependency Dropdowns With Javascript And PHP
Free SSL Certificate For CPanel
Route Model Binding In Laravel & Change Default Column id To Another Column
Client-Side Form Validation With Javascript


