

Good content takes time and effort to come up with.
Please consider supporting us by just disabling your AD BLOCKER and reloading this page again.


We will cover the following topics
GitHub Repository: https://github.com/channaveer/docker-nginx-mongodb
As you know with Docker's help, we can run our project on multiple devices without project software dependencies and developers bragging that it's working on your laptop but not mine.
For example, if I want to run ExpressJs (NodeJs) with the MongoDB application then I have to go ahead and download NodeJs as per my operating system and I have to download MongoDB and set it up according to the operating system. You might have configured your operating system-specific settings the same has to be shared with your colleagues, this will be an overhead in itself to manage all these settings and dependencies of your project.
In my latest project, I got a chance to work extensively on Docker. In this article, let me walk you through how we can set up Docker to run NodeJs, and MongoDB like a breeze. Later we will see how we can access MongoDB from MongoDB Compass.
The following is the project structure of my ExpressJs application.
node_modules/
index.js
Dockerfile
docker-compose.yml
.dockerignore
package.json
package-lock.json
docker-compose.yml is used run multiple services and manage them with ease.
Dockerfile is used to create our custom docker image.
NOTE: I have added comments in the Dockerfile and docker-compose.yml to make sure you understand each and every line
FROM node:18.12-slim

WORKDIR /usr/app

COPY ./package.json ./

#Install dependencies
RUN npm install

#Copy rest of the code to container
COPY . .

EXPOSE 3090

# Run the API on Nodemon
CMD ["npm", "run", "start"]
version: '3.8'

services:
    mongo:
        #Container name of mongodb
        container_name: stackcoder-mongo
        #Docker image from hub.docker.com
        image: mongo
        environment:
            #Default username, password and database of mongodb
            MONGO_INITDB_ROOT_USERNAME: root
            MONGO_INITDB_ROOT_PASSWORD: root
            MONGO_INITDB_DATABASE: stackcoder
        ports:
            - 27017:27017
        volumes:
            #Adding volume makes sure that data is persistant and wont get deleted after your docker stops
            #Everytime this mongodb service starts data from your system mongo-data gets replicated to /data/db folder inside docker container
            - mongo-data:/data/db
        networks:
            #Adding network makes sure that we can operate with our API's like local setup
            - stackcoder

    api:
        #Container name of your API
        container_name: stackcoder-api
        #Since we are building image on our own we point to the Dockerfile path
        build:
            #Context tell the path to look for Dockerfile
            context: .
            dockerfile: Dockerfile
        ports:
            #We can access the API's like http://localhost:3090
            - 3090:3090
        volumes:
            #Map your system local project files and folders to docker container /usr/app
            - .:/usr/app/
            - ./node_modules:/usr/app/node_modules
        networks:
            - stackcoder
        depends_on:
            - mongo

#Networks are used to make sure that all the services can interoperate with ease
networks:
    stackcoder:
        driver: bridge

#Volumes are used to persist the data even after docker restart
volumes:
    mongo-data:
        driver: local
    api:
        driver: local
Note: If MongoDB port 27017 is already taken in your localhost then change MongoDB ports to 27018:27017. Later you can connect in your MongoDB compass with URI mongodb://root:root@localhost:27018/node_modules Dockerfile .git
{
  "name": "docker-tuts",
  "version": "1.0.0",
  "description": "",
  "main": "index.js",
  "scripts": {
    "start": "nodemon ./index.js 4000",
    "test": "echo \"Error: no test specified\" && exit 1"
  },
  "keywords": [],
  "author": "",
  "license": "ISC",
  "dependencies": {
    "express": "^4.18.2",
    "nodemon": "^2.0.20"
  }
}
const express = require("express");

const app = express();

app.get("/", (request, response) => {
    return response.status(200).json({
        status: "success",
        message: "Successfully running..."
    });
});

app.listen(4000, () => {
    return console.log("App listening on port 4000");
});
NOTE: Make sure you have started your docker service. In Mac, Linux & Windows you might have installed Docker Desktop
Once you make sure you have started your docker desktop now run the following command to start docker services.
#To run docker services in background ie, detached mode
docker-compose up -d
#To run docker services in foreground
docker-compose up
You can download MongoDB Compass at https://www.mongodb.com/try/download/compass
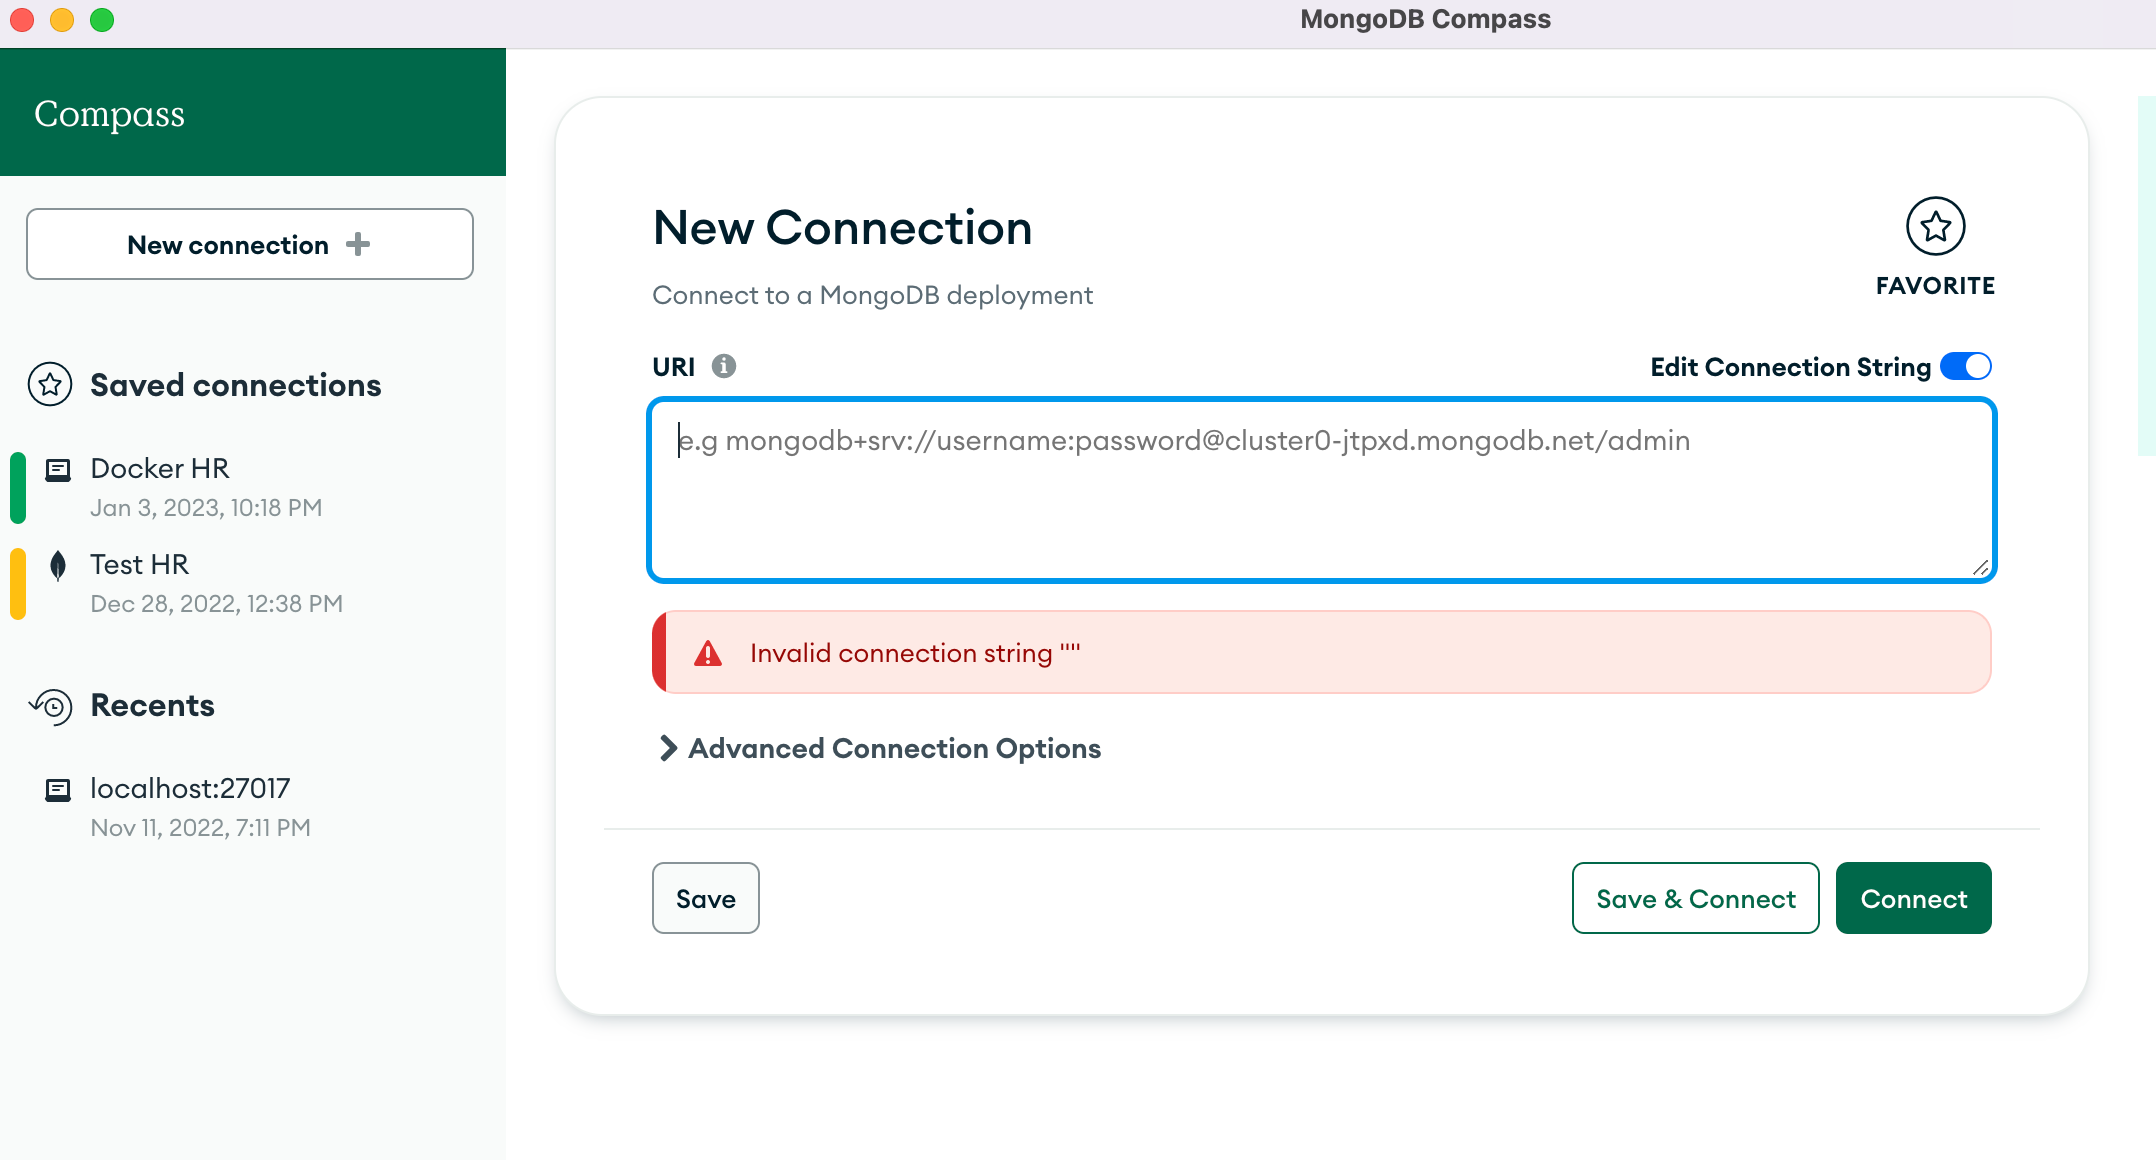
New MongoDB Connection
mongodb://root:root@localhost:27017/

MongoDB URI string to connect MongoDB inside Docker
Yay! You are all set to work on your NodeJs project now.
NOTE: If MongoDB port 27017 is already taken in your localhost then change MongoDB ports to 27018:27017. Later you can connect in your MongoDB compass with URI mongodb://root:root@localhost:27018/Search Engine Optimization Concepts
Factories To Speed Up Test-Driven Development In Laravel
Setup Docker for NodeJs, MongoDB, MongoDB Compass
Relationship Table Data With Route Model Binding In Laravel
SummerNote WYSIWYG Text Editor Save Images To Public Path In PHP Laravel
Google, Twitter, GitHub, Facebook & Many Other Social Generic Logins With PHP Laravel Socialite
Getting Started With AMP (Accelerated Mobile Pages)
GitHub Login With PHP Laravel Socialite
Multiple GIT Key Pairs Or Account In The Same Computer
Free Live Chat Integration Using TAWK.IO
Create A Composer Package? Test It Locally And Add To Packagist Repository
Install RabbitMQ with Docker & Running with NodeJS


