

Good content takes time and effort to come up with.
Please consider supporting us by just disabling your AD BLOCKER and reloading this page again.


In frameworks like Larvel, Symfony, Codeigniter Mail functionality is built in with minor efforts you will start sending the mails. But when you don't use any frameworks it's bit tricky but very easy to achieve.
In this article you will learn how to
First head to GitHub repository with this link PHPMailer. On right side click on Clone Or Download button & download as ZIP.
Once you download you need to include in your project folder.
NOTE: I have renamed it to mailer folder for accessibility which including in project.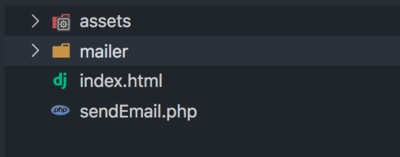
PHP Mailer Renamed To mailer Folder
If your using composer then first go to your working project and run the following command to download as composer package
composer require phpmailer/phpmailer
With above command it will get included in vendor folder.
Once you have download now its time to include in your project.
If you have downloaded the PHPMailer manually then you have include in the file with require as follows:
<?php
use PHPMailer\PHPMailer\SMTP;
use PHPMailer\PHPMailer\Exception;
use PHPMailer\PHPMailer\PHPMailer;

require './mailer/src/Exception.php';
require './mailer/src/PHPMailer.php';
require './mailer/src/SMTP.php';
Here you just need to include the vendor's autoload.php file which is responsible to autoload your dependency class of your class like the following
<?php
// Import PHPMailer classes into the global namespace
// These must be at the top of your script, not inside a function
use PHPMailer\PHPMailer\PHPMailer;
use PHPMailer\PHPMailer\SMTP;
use PHPMailer\PHPMailer\Exception;

// Load Composer's autoloader
require 'vendor/autoload.php';
Now we have included in our file lets configure SMTP connection for sending emails.
For the sake of easy understanding I have included the comments in the following code
//Server settings
// $mail->SMTPDebug = SMTP::DEBUG_SERVER; // Enable verbose debug output
$mail->isSMTP();                          // Send using SMTP
$mail->Host       = 'smtp.sendgrid.net';  // Set the SMTP server to send through
$mail->SMTPAuth   = true;                 // Enable SMTP authentication
$mail->Username   = 'username';           // SMTP username
$mail->Password   = 'password';           // SMTP password
$mail->SMTPSecure = PHPMailer::ENCRYPTION_STARTTLS; // Enable TLS encryption; `PHPMailer::ENCRYPTION_SMTPS` encouraged
$mail->Port       = 587;                  // TCP port to connect to, use 465 for `PHPMailer::ENCRYPTION_SMTPS` above
The above is the basic settings for the normal SMTP connections. Here I have used sendgrid as an example as I use it. You can even use GMAIL for free emails.
Lets put together the above code and built a simple code to send the email. Here I am sending HTML mail
I want to demonstrate the manual package downloaded because many of them find it difficult. If your using composer then not need to require any files everything will be handled by autoload.php just make sure to include is as show in step 2
<?php
use PHPMailer\PHPMailer\SMTP;
use PHPMailer\PHPMailer\Exception;
use PHPMailer\PHPMailer\PHPMailer;

require './mailer/src/Exception.php';
require './mailer/src/PHPMailer.php';
require './mailer/src/SMTP.php';

try {
    //Server settings
    //Server settings
    // $mail->SMTPDebug = SMTP::DEBUG_SERVER; // Enable verbose debug output
    $mail->isSMTP();                          // Send using SMTP
    $mail->Host       = 'smtp.sendgrid.net';  // Set the SMTP server to send through
    $mail->SMTPAuth   = true;                 // Enable SMTP authentication
    $mail->Username   = 'username';           // SMTP username
    $mail->Password   = 'password';           // SMTP password
    $mail->SMTPSecure = PHPMailer::ENCRYPTION_STARTTLS; // Enable TLS encryption; `PHPMailer::ENCRYPTION_SMTPS` encouraged
    $mail->Port       = 587;                  // TCP port to connect to, use 465 for `PHPMailer::ENCRYPTION_SMTPS` above

    //Recipients
    /** This is basically you, your company */
    $mail->setFrom('sender_email@example.com', 'SenderName');
    /** Add recipients this is basically your customers or who you want to add */
    $mail->addAddress('customer1@gmail.com', 'Customer Name');
    $mail->addReplyTo('customer2@yahoo.com'); //Name is options
    //$mail->addCC('cc@example.com');

    // Content
    $mail->isHTML(true);  // Set email format to HTML
    $mail->Subject = 'Subject of your email';
    $mail->Body    = 'Hi,<br/>This is HTML email<br/>Thanks & Regards<br/>StackCoder';

    $mail->send();

    $data = array(
        'status' => 'Congratulation',
        'message' => 'Your message sent successfully.'
    );
    echo json_encode($data);
    exit;
} catch (Exception $e) {
    echo "Message could not be sent. Mailer Error";
    /** Uncomment the following during development for detailed error information */
    // echo "Message could not be sent. Mailer Error: {$mail->ErrorInfo}";
}
In the above example we have seen sender, reply to example lets see how we can add more options to it.
I have explained everything in the code so that it will be very easy for you to understand.
//Recipients
/** This is basically you, your company */
$mail->setFrom('sender_email@example.com', 'SenderName');

/** Add recipients this is basically your customers or who you want to add */
$mail->addAddress('customer1@gmail.com', 'Customer Name');
$mail->addAddress('customer1@gmail.com') //Name is optional;


/** Sender name and replying mails can be different as shown below
    If you dont want different then you have to add same as below


    $mail->addReplyTo('sender_email@example.com', 'SenderName');
 */

$mail->addReplyTo('customer2@yahoo.com', 'Sender Name');


/** Add carbon copy mails over here, you can add multiple. Name is optional */
$mail->addCC('cc@example.com', 'Some Name');
$mail->addCC('cc@example.com');


/** You can add blind carbon copy emails over here. Name is options */
$mail->addBCC('bcc@example.com');
$mail->addBCC('bcc@example.com');
While sending emails there might arise the requirement to add attachments, whether it might be images, files or compressed folders.
In PHPMailer you can easily achieve it by using the following
// Attachments
$mail->addAttachment('/var/tmp/file.tar.gz');         // Add attachments
$mail->addAttachment('/tmp/image.jpg', 'new.jpg');    // Optional name
$mail->send();
You need to add before $mail->send();
Hope you learnt something new. If you liked it then please share with your friends.
Redirect www to a non-www Website Or Vice Versa
Simple Way To Create Resourceful API Controller In Laravel
Testing Laravel Emails With MailHog
URL Redirects From Called Functions In Laravel
Upload File From Frontend Server {GuzzleHttp} To REST API Server In PHP {Laravel}
Install Apache Web Server On Ubuntu 20.04 / Linux & Manage It
Multiple GIT Key Pairs Or Account In The Same Computer
Sass or SCSS @function vs @mixin
Custom Validation Rules In PHP Laravel (Using Artisan Command)
SummerNote WYSIWYG Text Editor Save Images To Public Path In PHP Laravel
Global Data In All Laravel Blade Pages
Lazy Load YouTube And Other Videos In Website
Google, Twitter, GitHub, Facebook & Many Other Social Generic Logins With PHP Laravel Socialite


