

Good content takes time and effort to come up with.
Please consider supporting us by just disabling your AD BLOCKER and reloading this page again.


We will implement a Facebook login with the PHP Laravel Socialite package. This package is really awesome for all social logins.
We will cover the following
I have also written an article on Google, Twitter, GitHub, Facebook & Many Other Social Generic Logins With PHP Laravel Socialite
If you have already setup Laravel then skip to the next step. Let's install Laravel application with the composer.
composer create-project --prefer-dist laravel/laravel socialite_testing
If you would like to learn more on the composer then I have written an article on it @ What Is Composer? How Does It Work? Useful Composer Commands And Usage
For working with any social login we are having a cool official package from Laravel Socialite. Let's integrate it on our project using composer with the following command
composer require laravel/socialite
First, go to the Facebook developer website using this link Facebook Developers. And Sign In to your account. Now you will be able to see the following screen
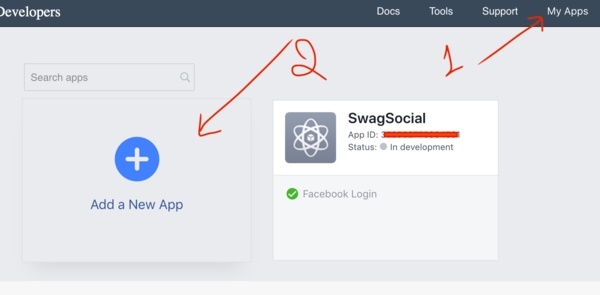
Facebook New Application Creation
1) My Apps - After login to your Developer Facebook account click on My Apps option on the top right
2) Add New App - Now you will be able to see all your apps. Click on Add New App button to create the new app for the login feature
Now you will be able to see the following modal box in which you can add appropriate details and click on the Create App ID button.
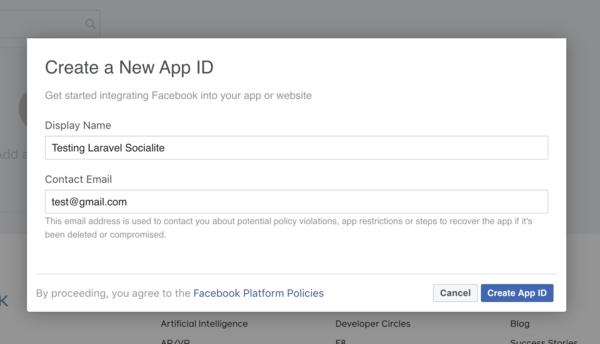
Facebook New App ID
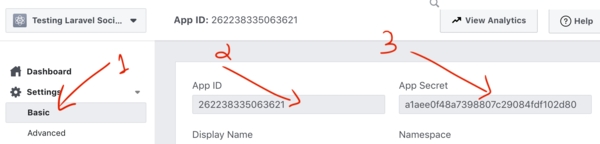
Facebook oAuth Details
1) Under Settings click on the Basic link to check your Facebook OAuth details
2) This is your OAuth App Client ID
3) Is your OAuth App Client Secret.
Don't forget this step else the return redirect URL after successful authentication won't work
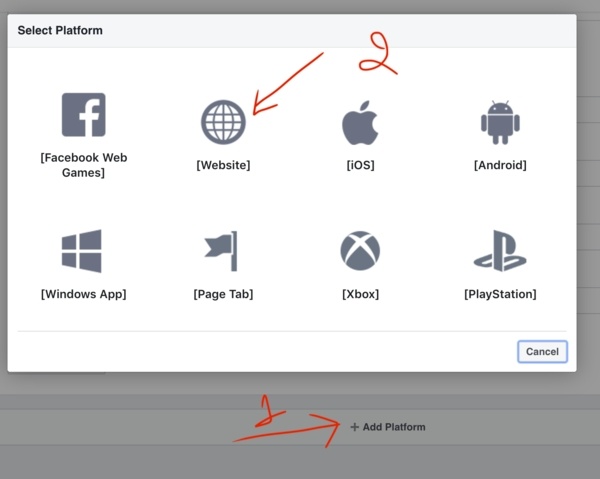
Settings -> Basic -> Add Platform -> Website
To add the platform you can navigate to Settings -> Basic -> Add Platform -> Website ->
http://localhost:8888
Basically we need to store the Provider Type and Provider Auth Token in our database so that we can verify the user for later usage
Schema::create('users', function (Blueprint $table) {
    $table->bigIncrements('id');
    $table->string('provider_type')->nullable()->comment('Social Account Type');
    $table->string('provider_token')->nullable()->comment('Social Account Token');
    $table->string('name');
    $table->string('password')->nullable();
    $table->string('forgot_password')->nullable();
    $table->string('email');
    $table->string('phone')->nullable();
    $table->boolean('is_blocked')->default(0);
    $table->softDeletes();
    $table->timestamps();
});
I haven't used the default authentication for personal preferences, but feel free to use it. Please observe that I have nulled basically most of the fields.
Let's configure the Facebook OAuth credentials in our Laravel application as follows
'facebook' => [
    'client_id' => env('FACEBOOK_CLIENT_ID'),
    'client_secret' => env('FACEBOOK_CLIENT_SECRET'),
    'redirect' => env('FACEBOOK_CALLBACK_URL'),
]
Append to the end of the return [] array in services.php
Basically any socialite account needs 3 things in the configuration
i) OAuth Client ID
ii) OAuth Client Secret
iii) Redirect URL which will be used to redirect back to your website URL after successful authentication
As we must not store any credentials inside our code so we will put the credentials inside .env file
# Facebook OAuth
FACEBOOK_CLIENT_ID=432902173384581
FACEBOOK_CLIENT_SECRET=a5d233f8fc8baa694ee10a3a34501e823
FACEBOOK_CALLBACK_URL=http://localhost:8888/auth/facebook/callback
Now we have done all the configurations parts lets get to coding part.
First, lets create the routes for our application inside web.php file as follows
Route::get('/auth/facebook', 'AuthController@socialProvider');
Route::get('/auth/facebook/callback', 'AuthController@socialProviderCallback');
AuthController@socialProvider [/auth/facebook] - This route method will decide which social web application it needs to redirect
AuthController@socialProviderCallback [/auth/facebook/callback]- This route method will be the one which will be called back after the authentication is successful from Facebook and we will see how to register the user.
By using Laravel Socialite its breeze for developer's life as it will handle most of the part for us.
As we saw from routes that we are redirecting [AuthController@socialProvider] to AuthController's socialProvider method. The following is the implementation
public function socialProvider()
{
  return Socialite::driver('facebook')->redirect();
}
Note: The driver's name must be the same as that of the services key name.
When you run the application on website with the following URL, it will take to the Facebook verification page
http://localhost:8888/auth/facebook
Now you will be redirected to Facebook login page if you have not logged in or Facebook authorize page in you have already logged in to it.
With Step 7 when you click on Authorize button and if the authentication is successful then it will redirect back to [AuthController@socialProviderCallback] AuthControllers's socialProviderCallback method.
So now we need to implement how to handle once we get back the successful redirect. Let's implement it.
public function socialProviderCallback()
{
    /** Using try catch because if any user directly hits the URL then
    * it will throw exception
    */
    try {
        /** Use socialite to get the user details like token, name, email, profile pic
        * as per your needs
        */
        $socialUser     = Socialite::driver('facebook')->user();
        $token          = $socialUser->token;
        $name           = $socialUser->name;
        $email          = $socialUser->email;

        /** Uncomment the following to check the details description of user details */
        //echo '<pre>'; print_r($socialUser);exit;

        /** Get the user details */
        $user           = User::where('email', $email)->first();

        /** If no user found with that email then you can insert into database */
        if (!$user) {
            /** Create new user with Facebook credentials */
            $newUser = User::create([
                'provider_type'     => 'facebook',
                'provider_token'    => $token,
                'name'              => $name,
                'email'             => $email,
            ]);
            /** User is valid and store his details in session and redirect to dashboard */
            session()->put('user_details', $newUser);
            return redirect('/user/dashboard')->send();
        }
        /** Check user with provider of your database */
        if ($user->provider_type != 'facebook') {
            session()->flash('error', 'Please try logging with Facebook');
            return redirect('/auth/login');
        }
        /** Every time after successful authentication we will update provider token of our database */
        $user->provider_token = $token;
        $user->save();

        /** User is valid and store his details in session and redirect to dashboard */
        session()->put('user_details', $user);
        return redirect('/user/dashboard')->send();
    } catch (\Exception $e) {
        session()->flash('error', 'Oops error in validating you. Try again');
        return redirect('/auth/login');
    }
}
I have tried to explain most of the code details with comments hope it helps you.
Hope you enjoyed the article. Please share it with your friends.
Test Your Local Developing Laravel Web Application From Phone Browser Without Any Software
Dependency Dropdowns With Javascript And PHP
Client-Side Form Validation With Javascript
Install Linux, Apache, MYSQL, PHP (LAMP Stack) on Ubuntu
Why namespace And use Keywords Used In PHP
@stack @push and @prepend In Laravel Blade
Basic Server Security Setup For Ubuntu / Linux
Move Uploaded Files From Local Computer Or Server To Amazon S3 Bucket In PHP
Google reCAPTCHA Integration In PHP Laravel Forms
Setup MAMP Virtual Hosts For Local PHP Development
Factory States For Clean And Fluent Laravel Testing
Resolve 404 Not Found In NGINX
PHP Built-In Web Server & Testing Your Development Project In Mobile Without Any Software


